

How To Change The Icon On Apps Made Via Script Editor

Beta ribbon and build number.
So, you've finished a beta version of your app, and finally at that place are some fresh eyeballs and brains helping yous test and perfect the app that's going to brand y'all rich…or at least fatten your portfolio.
Merely wouldn't information technology be helpful if testers had an like shooting fish in a barrel way to check which build version of the app they have?
This tutorial will show y'all how to exercise that, and perhaps introduce you to a few lesser-known features of Xcode.
Would you believe you lot aren't going to write a single line of Swift in this tutorial? No, seriously, and you won't exist writing any Objective-C either. :]
This tutorial will have yous writing simply fustigate beat out scripts. Y'all'll employ a tool chosen ImageMagick, Last and Xcode to write a script that will automatically overlay the build version and a "debug" or "beta" ribbon to your app's icon.
This tutorial assumes y'all have some basic knowledge of Unix scripting. You can probably follow along without being a shell scripting guru, but yous tin can as well look up what you need at Bash Beginners Guide or Advanced Bash Scripting Guide .
And then, practice you want get going?
Getting Started
Outset things first, you'll need ImageMagick installed, which is a powerful paradigm processing software suite that y'all collaborate with exclusively via Terminal.
You tin easily install ImageMagick with Homebrew.
If you don't have Homebrew installed or perhaps don't know what information technology's, y'all can learn nearly it and how to install from the tools homepage.
If yous already have Homebrew installed, information technology's notwithstanding a good idea to launch Terminal and enter
brew update This will make sure that you're getting the latest version of any packet you lot install from Homebrew. It will as well inform y'all if you don't take Homebrew installed.
OK cool, you're all gear up to employ Homebrew to install the packages you demand. Now run the post-obit command:
brew install ImageMagick 
Y'all should see a monologue from Homebrew that explains the installation of ImageMagick, then follow the steps to install the programme.
You'll besides need to install the software suite Ghostscript, considering the text functions you'll need in ImageMagick depend on it. Ghostscript is a software suite designed for rendering PDF and PS files. Y'all need it because it provides the font support for ImageMagick.
Install Ghostscript past running the command:
brew install ghostscript If you come across any difficulties later on, run this control:
brew dr. If anything has gone awry, you'll get a bulletin almost it, along with instructions for how to set it.
And that's all y'all need to install to be able to work through this tutorial.
Hello Llama
ImageMagick has many commands, but the 2 you need for this tutorial are convert and composite.
- convert takes an image, modifies it, and then saves the consequence as a new prototype.
- composite takes an epitome, overlays it on another image, and outputs the outcome to a third image.
This tutorial provides some sample icons for you to use. Of form, y'all may use your own, but you'll need to adapt the file names accordingly. Download the sample icons, and for the purposes of this tutorial, place them on the desktop.
One of the goals here is to overlay the build version on the app'southward icon. Then you lot'll run across how to use ImageMagick to overlay text on an image by putting Hello Earth on ane of these icons. Open Final and navigate to the app icon folder:
cd ~/Desktop/AppIconSet Now type:
convert AppIcon60x60@2x.png -fill white -font Times-Bold -pointsize 18 -gravity s -comment 0 "Hullo World" examination.png I'll break this command downward for you, parameter by parameter, and then you understand what's going on:
- AppIcon60x60@2x.png is the input prototype's file name;
- fill white sets the text'southward fill color to white;
- font Times-Assuming instructs ImageMagick to use the assuming variant of the Times typeface for any text;
- pointsize eighteen sets the font size to 18 pixels;
- gravity southward means any text generated past the command volition exist aligned at the bottom of the epitome
- comment 0 "Hello World" tells ImageMagick to annotate the paradigm with the text Hello Earth at an angle of 0 degrees;
- examination.png is the proper name of the output file, and ImageMagick will overwrite the existing file if it already exists.
If yous didn't see whatsoever errors on the screen, you will now see a file named exam.png in the AppIconSet binder, and it will look like this:

Note: If you go error letters or the script simply doesn't work, information technology'southward possible that y'all don't take the necessary fonts installed. To find out which fonts are bachelor to you, run the post-obit command in Terminal:
convert -list font If you don't take the Times font, choose one from the listing and use that instead.
OK, at present that y'all've done that, you lot'll put a beta ribbon on it. In Terminal blazon:
composite betaRibbon.png exam.png test2.png This takes betaRibbon.png and places it on acme of test.png, and then saves the composited epitome to test2.png.
Open test2.png. Await, Information technology looks just like the original test.png!

Then here's what's going on:
exam.png is 120 x 120 pixels in size. Nevertheless, betaRibbon.png is 1024×1014 pixels, and then only the transparent parts of betaRibbon.png are applied to test.png, and the rest is cropped.
Don't believe me? Try running the same control, simply swap the places of betaRibbon.png and examination.png:
blended test.png betaRibbon.png test2.png You'll at present see a much larger image with the ribbon where it'southward always been and the test.png image aligned at the height left:

For this to work correctly, yous need to resize betaRibbon.png to be 120 ten 120. This is very easy in ImageMagick – simply type:
convert betaRibbon.png -resize 120x120 smallBetaRibbon.png This command resizes betaRibbon.png to 120 x 120 pixels and saves the result equally smallBetaRibbon.png.
Now, execute the following:
composite smallBetaRibbon.png test.png test2.png Open test2.png, and you'll see it now looks like information technology'south supposed to:

So that's all of the ImageMagick functionality you'll need for this tutorial, only know that it'southward simply the tip of the iceberg as far as what ImageMagick tin practice. Check out ImageMagick's home page to learn more.
Xcode
After all that epitome processing work, it's time to cleanse your palate by working in some familiar territory.
Open Xcode, select File\New\Project…, choose the iOS\Application\Unmarried View Application template, and click Next. Name the project Llama Trot, gear up the selected language to Swift, and set the device family to Universal. For simplicity, relieve the project to the desktop.
Your goal is to have Xcode and ImageMagick generate an appropriate icon every time you build the project, based on the selected build configuration.
Xcode has the ability to use run scripts to do things when your project is congenital. A run script is just a Unix script, like what you've already written, that executes every time you run your Xcode project.
Setting Upwards a Run Script
In your project, select the Llama Trot target, and navigate to Build Phases. Click the + icon and select New Run Script Phase from the popup menu:

You'll see the Run Script Phase added to your projection's phases.
Within that run script, the Shell parameter should be car-set up to bin/sh, which means that this script will execute in the bash Unix shell.
Underneath the shell parameter is a box for y'all to enter your script. Type the line below into that box:
echo "Hello World" Your new build stage should now wait like the post-obit:

Build and run. You lot should see admittedly nothing interesting. That's because the script printed Hello World to your build logs while y'all weren't looking.
Navigate to the Report Navigator-that'due south the icon on the far right of Xcode's Navigator Pane-and click on the nearly contempo build report, equally shown in the image beneath. In the wall of text describing all of the piece of work that Xcode does for you lot when you build a projection, you'll run across the text Hello World:

App Icons
Great, you've gotten a script to output Hello World, like you've probably done a million times by this point in your career as a developer. Now it's fourth dimension to alter the app icons.
Finding the App Icons From Your Script
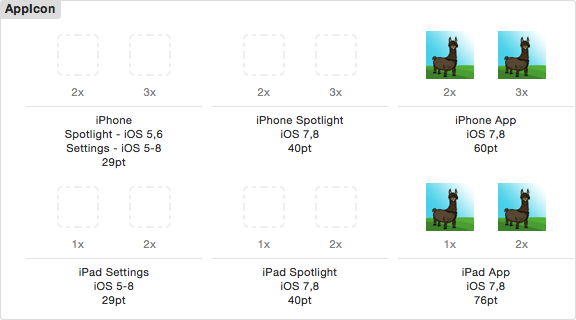
Add all the app icons to your Images.xcassets asset catalog by navigating to Images.xcassets in Xcode and dragging each icon into it'southward advisable tile in the AppIcon image set:
Y'all'll also demand to put debugRibbon.png and betaRibbon.png in your project's root directory-the aforementioned binder where your projection's .xcodeproj file is.

In club practice annihilation with the icons, your script needs to know where they are. Supplant your run script with the post-obit code:
repeat "${BUILT_PRODUCTS_DIR}/${UNLOCALIZED_RESOURCES_FOLDER_PATH}" echo "${SRCROOT}" - The kickoff line prints the path to the binder that will contain the final icons after you run your projection.
- The 2d line prints the folder path of where your project files are located.
This works by using some of Xcode's many build settings' variables.
Run your project and bank check the build study. Yous should see the folder path that describes the location of your project'south final products. Under that, you should see the folder path of your project directory:

Navigate to the commencement path in Finder and expect at what'due south in there; you lot'll meet all of the products of your app, including all of the app icons. This is where yous'll save the icons that ImageMagick modifies.
To come across these icons, right-click on the Application icon in that folder, and then select Prove Package Contents. For now they look perfectly normal!

Now navigate to the second folder path that you lot echoed out. This is simply your normal project binder. And so where are the app icons?
Go into the folder that has the same proper name every bit your project-in this example "Llama Trot". In there yous'll run across Images.xcassets. Open up Images.xcasset and yous'll see however another folder named AppIcon.appiconset.
The app icons are in that folder, and y'all'll modify them with ImageMagick. Assuming y'all saved your project to the desktop and named it Llama Trot, the path to the icons is ~/Desktop/Llama\ Trot/Llama\ Trot/Images.xcassets/AppIcon.appiconset
Yous're going to crook a piddling chip to get the full path to the initial icons, so replace the last line of your script with:
IFS=$'\n' repeat $(observe ${SRCROOT} -name "AppIcon60x60@2x.png") - The first line temporarily sets the IFS-internal field separator-to the newline character. If you lot don't exercise this, the second line volition neglect because the file proper name, Llama Trot, contains a space-effort commenting out the first line if you're curious about what happens.
- The second line in this command searches the
${SRCROOT}binder recursively for the fileAppIcon60x60@2x.png.
By the way, information technology's important that yous type the line IFS=$'\north' precisely as it appears–no spaces on either side of the = sign.
Run the projection, and you lot'll meet the total path to AppIcon60x60@2x echoed out:

Putting It All Together
The hard work is over. At present it's fourth dimension to put everything together and get your script to modify the app icons properly. You'll start by merely modifying AppIcon60x60@2x.png, so work towards generalizing it for all of the app icons. This means you'll demand to test with a retina @2x iPhone simulator or device-and so non the iPhone half-dozen+.
By combining the techniques from ImageMagick and your previous script, you finish up with the following script. Make sure to update your script accordingly:
IFS=$'\n' #i PATH=${PATH}:/usr/local/bin #ii TARGET_PATH="${BUILT_PRODUCTS_DIR}/${UNLOCALIZED_RESOURCES_FOLDER_PATH}/AppIcon60x60@2x.png" BASE_IMAGE_PATH=$(find ${SRCROOT} -proper noun "AppIcon60x60@2x.png") #3 convert betaRibbon.png -resize 120x120 resizedBetaRibbon.png #iv convert ${BASE_IMAGE_PATH} -fill white -font Times-Bold -pointsize eighteen -gravity south -annotate 0 "Hello Earth" - | composite resizedBetaRibbon.png - ${TARGET_PATH} Here'southward a breakdown of what'due south happening:
- The build volition fail if you omit this line. Your terminal has a variable chosen
PATHthat stores a list of default script locations. Terminal looks there starting time for any commands that aren't a part of Unix by default. This allows any command located in a directory inPATHto run without specifying the full location of the command. Xcode needs to share the samePATHvariable as your terminal. This line adds/user/local/binto thePATHvariable where Homebrew installs its packages. - The next two lines get the location of the app icons, as before, and then they salve each path into variables
TARGET_PATHandBASE_IMAGE_PATHrespectively. - This line sizes the beta ribbon down to the appropriate size
- The terminal line does two things at once. Beginning, it annotates the initial app icon with the text Hello Globe. The script then pipes into the
compositefunction — that'southward what the | symbol is all about — and places the resized beta ribbon on elevation of it. ImageMagick does this past using a nuance "-" instead of the file name. The script saves the result as the production app icon.
Note: App icon names are non arbitrary. The proper name of the app icons must exist like AppIcon60x60@2x.png in the final production. Xcode uses this naming convention to make up one's mind which icon to use based on which device is in use.
Run the app and get to your device's home screen to see the icons for your app; if you're on the simulator, press Cmd + Shift + H to go to the habitation screen. You should run across a modified icon:

The Rest of the Icons
Now that you've done quite a bit with one icon, information technology's time to generalize the script to accomodate all your icons, and then it will work with iPad icons, the iPhone 6+ icon etc.
To practice this, you'll brand the icon modification code into a function that takes the icon'south name as an argument. Then execute that role for every icon that you accept.
Modify the script so information technology looks like the following:
PATH=${PATH}:/usr/local/bin IFS=$'\n' function generateIcon () { BASE_IMAGE_NAME=$1 TARGET_PATH="${BUILT_PRODUCTS_DIR}/${UNLOCALIZED_RESOURCES_FOLDER_PATH}/${BASE_IMAGE_NAME}" BASE_IMAGE_PATH=$(find ${SRCROOT} -proper noun ${BASE_IMAGE_NAME}) WIDTH=$(place -format %w ${BASE_IMAGE_PATH}) catechumen betaRibbon.png -resize $WIDTHx$WIDTH resizedRibbon.png convert ${BASE_IMAGE_PATH} -fill white -font Times-Bold -pointsize 18 -gravity south -annotate 0 "Hello Globe" - | composite resizedRibbon.png - ${TARGET_PATH} } generateIcon "AppIcon60x60@2x.png" generateIcon "AppIcon60x60@3x.png" generateIcon "AppIcon76x76~ipad.png" generateIcon "AppIcon76x76@2x~ipad.png" This puts the unabridged image processing code into a function called generateIcon(), and you lot pass the proper noun of the icon to procedure every bit an argument. The script accesses this argument by using $1, and sets information technology to the variable BASE_IMAGE_PATH. ${BASE_IMAGE_PATH} and then takes the place where AppIcon60x60@2x.png used to exist.
You'll as well notice a new ImageMagick role, identify, and this function gets information about an image. In this example, you desire to use the width that you obtain with the -format %w parameter on place to determine how to resize betaRibbon.png.
Now, switch to an iPad or an iPhone half dozen+ simulator and run the project; you'll see the modified app icons on the dwelling house screens.
You lot'll meet that on the new devices, the font size appears to be inconsistent. This is considering the font size is expressed in pixels, and different device screens take unlike pixel densities.

There's an like shooting fish in a barrel ready for this. All you really want is the summit of the text to exist a certain proportion to the height of the entire icon.
Add the post-obit line to your script immediately later where yous set the WIDTH variable:
FONT_SIZE=$(repeat "$WIDTH * .xv" | bc -l) This line is a niggling tricky, but what it does is gear up a FONT_SIZE variable to exist i-fifth of the WIDTH variable. Since Unix arithmetic doesn't support floating point arithmetic, you must utilise the bc plan.
Brusque for basic calculator, bc tin can practice floating indicate calculation. Since it's a stand up-lonely programme, the string $WIDTH * .xv needs to piped in for information technology to execute what you desire.
At present, change terminal line of generateIcon() to apply the value of FONT_SIZE instead of the hard-coded value of 18. The resulting script looks like this:
PATH=${PATH}:/usr/local/bin IFS=$'\n' office generateIcon () { BASE_IMAGE_NAME=$1 TARGET_PATH="${BUILT_PRODUCTS_DIR}/${UNLOCALIZED_RESOURCES_FOLDER_PATH}/${BASE_IMAGE_NAME}" BASE_IMAGE_PATH=$(find ${SRCROOT} -proper noun ${BASE_IMAGE_NAME}) WIDTH=$(identify -format %west ${BASE_IMAGE_PATH}) FONT_SIZE=$(repeat "$WIDTH * .15" | bc -l) convert betaRibbon.png -resize $WIDTHx$WIDTH resizedRibbon.png convert ${BASE_IMAGE_PATH} -fill white -font Times-Bold -pointsize ${FONT_SIZE} -gravity due south -annotate 0 "Hello World" - | composite resizedRibbon.png - ${TARGET_PATH} } generateIcon "AppIcon60x60@2x.png" generateIcon "AppIcon60x60@3x.png" generateIcon "AppIcon76x76~ipad.png" generateIcon "AppIcon76x76@2x~ipad.png" Run your project on various devices, and you lot'll meet that things look much meliorate.

Bye Globe, Hello Build Number
Equally tempting as it's to leave the Hello World text as an homage to the early days, yous want to put the build number on these icons, and actually, it's a pretty easy thing to do.
The build number tin exist establish as the CFBundleVersion entry in the Info.plist file of your project.
So how are you going to get it into your script? As it turns out, your Mac came with a program to help y'all exercise this. It's called PlistBuddy, and you lot'll observe it in /usr/libexec/.
Add together the following line to the very top of your script:
buildNumber=$(/usr/libexec/PlistBuddy -c "Print CFBundleVersion" "${PROJECT_DIR}/${INFOPLIST_FILE}") This line shows how to employ PlistBuddy to get your build number. Now just replace the "Hi World" part of your script with $buildNumber:
convert ${BASE_IMAGE_PATH} -fill white -font Times-Bold -pointsize ${FONT_SIZE} -gravity s -comment 0 "$buildNumber" - | composite resizedRibbon.png - ${TARGET_PATH} In the General tab of your target's settings, change your Build number to 2015:

Now run the project. You'll see an icon with the corresponding build number:

Build Configurations
Cool! The full loop is complete. You've' overlaid a beta ribbon and the build number to the app icon and information technology runs every fourth dimension you build your project.
But yous don't want a beta ribbon and build number all the time. What if you've got an blastoff build? Or more likely, what if yous're releasing a version and have a release build? You definitely don't want to put the build number on that.
That's where Build Configurations come in.
In Xcode, go to your project's configurations. You should see two configurations past default: Debug and Release.
Printing the +, choose Duplicate Release and rename it to Beta. This creates a new build configuration setup that is exactly the same as the Release configuration.

The Debug configuration will be the alpha/debug version, the Beta configuration will be the beta version, and the Release configuration volition be the release version of the app.
At present all you need to do is pull the configuration into your script with the CONFIGURATION build settings variable, and add together an if statement into your script make up one's mind to the electric current configuration. Update your script to the post-obit:
IFS=$'\northward' buildNumber=$(/usr/libexec/PlistBuddy -c "Print CFBundleVersion" "${PROJECT_DIR}/${INFOPLIST_FILE}") versionNumber=$(/usr/libexec/PlistBuddy -c "Print CFBundleShortVersionString" "${PROJECT_DIR}/${INFOPLIST_FILE}") PATH=${PATH}:/usr/local/bin function generateIcon () { BASE_IMAGE_NAME=$i TARGET_PATH="${BUILT_PRODUCTS_DIR}/${UNLOCALIZED_RESOURCES_FOLDER_PATH}/${BASE_IMAGE_NAME}" echo $TARGET_PATH echo $SRCROOT repeat $(notice ${SRCROOT} -proper name "AppIcon60x60@2x.png") BASE_IMAGE_PATH=$(find ${SRCROOT} -proper name ${BASE_IMAGE_NAME}) WIDTH=$(identify -format %w ${BASE_IMAGE_PATH}) FONT_SIZE=$(repeat "$WIDTH * .fifteen" | bc -l) echo "font size $FONT_SIZE" if [ "${CONFIGURATION}" == "Debug" ]; and so catechumen debugRibbon.png -resize ${WIDTH}x${WIDTH} resizedRibbon.png convert ${BASE_IMAGE_PATH} -fill white -font Times-Bold -pointsize ${FONT_SIZE} -gravity south -annotate 0 "$buildNumber" - | composite resizedRibbon.png - ${TARGET_PATH} fi if [ "${CONFIGURATION}" == "Beta" ]; then convert betaRibbon.png -resize ${WIDTH}10${WIDTH} resizedRibbon.png catechumen ${BASE_IMAGE_PATH} -fill white -font Times-Boldr -pointsize ${FONT_SIZE} -gravity s -annotate 0 "$buildNumber" - | composite resizedRibbon.png - ${TARGET_PATH} fi } generateIcon "AppIcon60x60@2x.png" generateIcon "AppIcon60x60@3x.png" generateIcon "AppIcon76x76~ipad.png" generateIcon "AppIcon76x76@2x~ipad.png" Here'southward what the changes enable:
- If the configuration is Debug, the script uses a debugRibbon.png.
- If the configuration is Beta, the script uses betaRibbon.png like before.
- If the configuration is Release, the script won't do anything considering the app icon should remain unmodified.
To change the build configuration, Cull Product\Scheme\Edit Scheme… select Info and and then choose the build configuration based on which action you'll do e.g., Run, Annal, Profile, etc.

Changing the build configuration for Run will reflect in your testing.
And that's information technology! You have build numbers and ribbons for the debug and beta version of you app!


Where To Get From Here?
This tutorial was pretty heavy in scripting, so if you got through it all, congrats!
Y'all tin become the version number of your projection with /usr/libexec/PlistBuddy -c "Print CFBundleShortVersionString".
You might desire to use that to provide the version number in addition to the build number on your icon.
There are numerous conveniences where Build Scripts tin can help you with all kinds of jobs. Hither are some of my favorites:
- Bump the build number every time an archive is made.
- Automated git tagging
- Generating seed databases before an app launch
Thanks for working through this tutorial today! You covered quite a flake and now know how to keep your various builds organized and clearly labeled for yourself and whatsoever testers you lot're working with. And you also learned how to use Build Scripts and ImageMagick to resize and marking up images based on your ain parameters. Talk about power!
Please feel free to share your questions, key learnings and any other ideas you have for using Build Scripts in the forums below.
Source: https://www.raywenderlich.com/1716-how-to-change-your-app-icon-at-build-time
Posted by: ybarraantwookes.blogspot.com
0 Response to "How To Change The Icon On Apps Made Via Script Editor"
Post a Comment